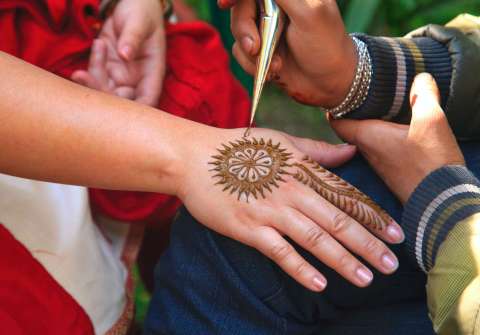
Festival season is one of the best times of the year to diversify your style and delve into alternative fashion and body art. This year, Style Caster is predicting that knitted bucket hats, ombre dresses, denim, and sheer dresses will be all the rage but one staple of festival looks will never be out of trend: henna tattoos. If you are keen to create your own henna looks this season and build up your design abilities with every new festival or outdoor concert, keep the following tips in mind.
Experimenting with Paste Making
The easiest way to get into DIY henna tattooing is to buy ready-made paste. If you want a quality paste that will stand the test of time and have an optimal texture for application, or if you want to save on costs, try making your paste yourself. Use a good quality powder from Rajasthan, a little lemon juice, and your favorite essential oil (tea tree oil, lavender, and orange all have very pleasant smells). Start with about three tablespoons of henna powder, adding enough lemon to make a paste with a texture similar to soft peanut butter. Once the mixture is clump-free, add about 12 drops of essential oil. Blend well and cover for two to three days. The wait is necessary as it is during this time that dye release takes place. The mixture should be kept at a temperature of around 70ºF. Anything much warmer will bake the mixture, and anything cooler will make the mixture take too long to release the dye. If you use ready-made henna, avoid black henna, as it is notorious for causing reactions.
Straining the Mixture
Once your dye is complete, it's time to place your mixture in a cone. It will first need to be filtered. You will need a triangle-shaped piping back and a cheap pair of stockings. First, place the piping back into a glass and fold the excess material over the glass. Then place the stocking into the glass and folder it over the edge as well. Lift both out of the bag, twist the big end of the plastic and squeeze. The henna mixture will strain the henna. Pull the stocking out with one hand, keeping the other hand firmly around the opening of the piping bag. Your mixture will now be perfect for application.
Making Your Henna Tattoo
Use the piping bag to place your mixture into smaller cones for ultra-precise work. Prior to this moment, choose the theme you would like to go for. You can go for traditional designs (which shall be discussed later) or make them completely personal. If you love nature, for instance, you may want to represent a butterfly garden, including simple shapes like daisies, grass blades, and butterflies. You can view easy tutorials for these shapes online. If you incorporate them into your designs, think of how you can frame your compositions (for instance, using an arch or circular shape) so you can have similar, complementary designs (such as birds, mammals, and forest animals). The designs need to be left on until they dry completely before being removed.
Incorporating Traditional Designs into Your Tattoo
To add an element of authenticity and tradition, consider incorporating popular henna designs. One is Sahasrara (similar to a lotus and representing unity, commonly seen on palms). Another is made up of various paisley designs drawn side by side. Flowers, eyes, leaves and vines, and Om symbols are also beautiful, spiritual, and deeply meaningful.
If you have a festival coming up, why not try making your own henna tattoos? You can either mix a paste from scratch or buy one ready-made (homemade tends to bear a more intense hue and last longer). Choose from an array of designs you find meaningful, feeling free to combine modern and traditional designs.


